I2P Hidden RetroShare Nodes
I2P is an anonymous overlay network - a network within a network. It is intended to protect communication from dragnet surveillance and monitoring by third parties such as ISPs. I2P can run Hidden Services similar to Tor Hidden Services. to route encrypted traffic inside the network to anonymize the Client and the Server.
RetroShare can be run behind an I2P Hidden Service for incoming connections. The outgoing connections are sent through a local I2P Socks Proxy. This makes it possible to obfuscate your metadata which could disclose your Network Friend Graph. The hidden service address (e.g. ld5...2z3p.b32.i2p) is replacing the IPv4 address (e.g. 192.168.1.216) as the listening address for incoming connections.
I2P allows clients and relays to offer hidden services. That is, you can offer a web server, SSH server, etc., without revealing your IP address to its users. In fact, because you don't use any public address, you can run a hidden service from behind your firewall.
Hidden Service Setup
I2P Installation
This Guide requires to have I2P already installed on your System.
If not, please refer to the official I2P Documentation
on how to install I2P.
Download I2P for various operating systems: I2P Download or I2PD Installing. This second option is a non official / community edition.
Outgoing I2P Proxy
For this we have to create a “Local tunnel” in the I2P Router Console. If
you have it running on your local computer, Hidden Service Manager should be located
at http://127.0.0.1:7657/i2ptunnelmgr
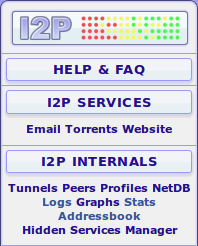
Click on Tunnel Wizard

If you need to connect to a remote service, such as an IRC server inside
I2P or a code repository, then you will require a CLIENT tunnel.

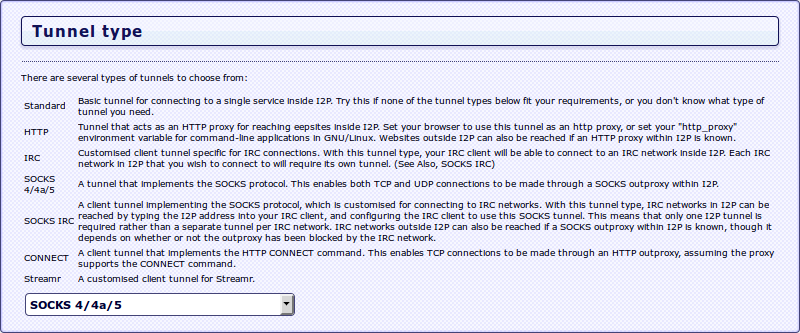
Select SOCKS 4/4a/5 - A tunnel that implements the SOCKS protocol.
This enables both TCP and UDP connections to be made through a SOCKS
outproxy within I2P.
Choose a name and description for your tunnel. These can be anything you
want - they are just for ease of identifying the tunnel in the routerconsole.

Leave Outproxies empty

This is the port that the client tunnel will be accessed from locally. This is also the client port for the HTTPBidir server tunnel.
- Select 4447 as RetroShare and I2P use this as the default
How do you want this tunnel to be accessed? By just this machine, your entire subnet, or external internet? You will most likely want to just allow 127.0.0.1
- let I2P Proxy bind to localhost/127.0.0.1 only

The I2P router can automatically start this tunnel for you when the
router is started. This can be useful for frequently-used tunnels
(especially server tunnels), but for tunnels that are only used
occasionally it would mean that the I2P router is creating and
maintaining unnecessary tunnels.

The wizard has now collected enough information to create your tunnel.
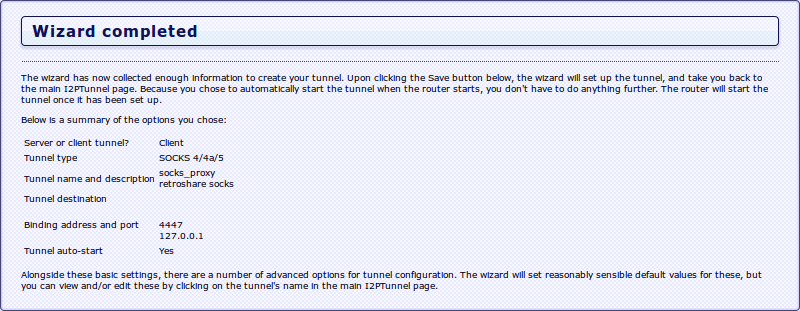
Configure your hidden service
For the incoming connections through I2P it's necessary to create a I2P Server Tunnel.
Hidden Service Manager for creating this local tunnel should be located
at http://127.0.0.1:7657/i2ptunnelmgr

Click on Tunnel Wizard

Server or client tunnel?
This wizard will take you through the various options available for
creating tunnels in I2P.
The first thing to decide is whether you want to create a server or a
client tunnel. If you need to connect to a remote service, such as an
IRC server inside I2P or a code repository, then you will require a CLIENT tunnel.
On the other hand, if you wish to host a service for others to connect to you'll need to create a SERVER tunnel.

Tunnel type
There are several types of tunnels to choose from:
Standard A basic server tunnel for hosting a generic service inside I2P.
Try this if none of the tunnel types below fit your requirements, or
you don't know what type of tunnel you need.

Tunnel name and description
Choose a name and description for your tunnel. These can be anything you
want - they are just for ease of identifying the tunnel in the routerconsole.

Binding address and port
This is the IP that your service is running on, this is usually on the
same machine so 127.0.0.1 is autofilled.
Host(H): 127.0.0.1
This is the port that the service is accepting connections on.
Port(P): 41222 You can choose any random port.

Tunnel auto-start
The I2P router can automatically start this tunnel for you when the
router is started. This can be useful for frequently-used tunnels
(especially server tunnels), but for tunnels that are only used
occassionally it would mean that the I2P router is creating and
maintaining unnecessary tunnels.

The wizard has now collected enough information to create your tunnel.

The status of the created tunnel and the tunnel ID (nnn.b32.i2p) is
available at the Hidden Service Manager.

Copy the Base32 address ending with .b32.i2p. It will be needed for your RetroShare I2P Node Creation.
RetroShare I2P Setup
For more details please also read Create New User for clearnet IPv4 Network Node.
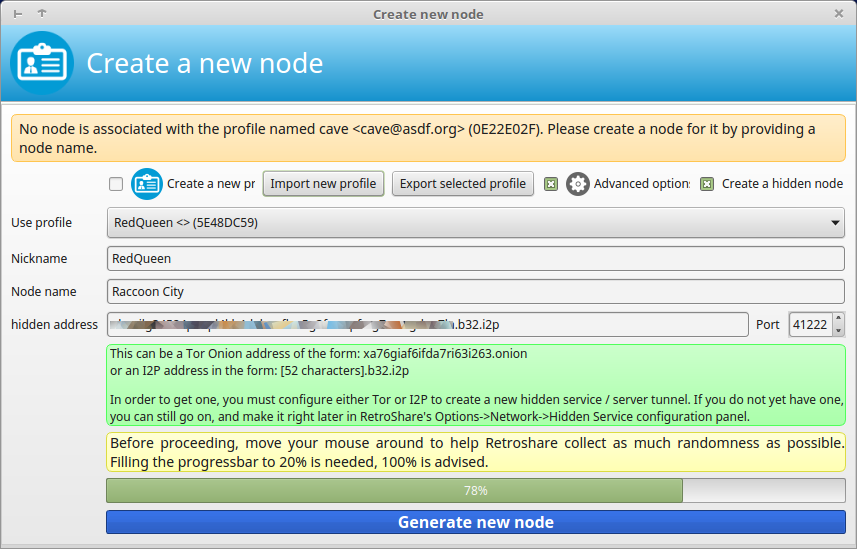
Network Configuration
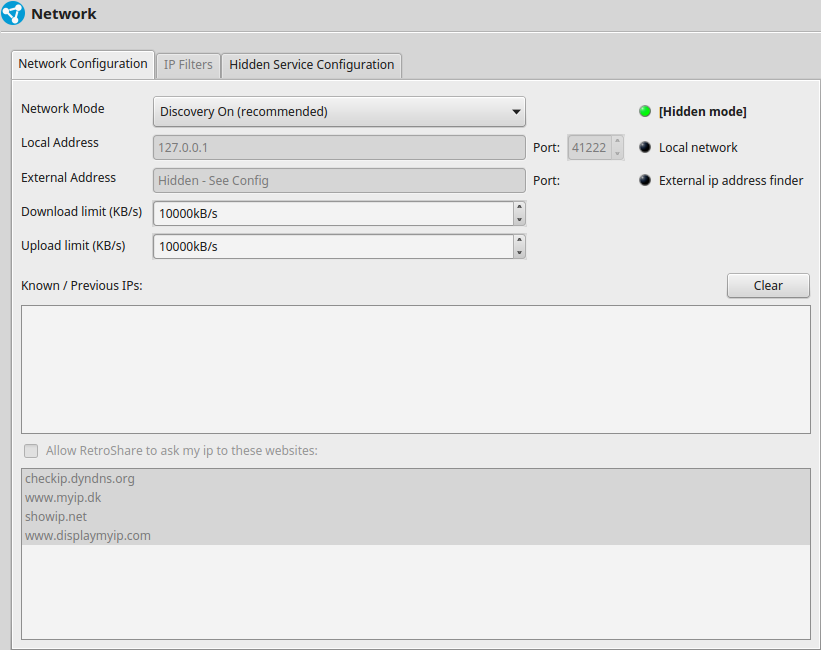
Check your Network Config. It should look different to a normal setting.
- Hidden Node Indicator
- DHT is disabled in Network Mode
Discovery is recommended, though also Darknet(Discovery & DHT are disabled) may be used. - Local Address is locked to localhost (127.0.0.1)
- external Address is hidden
- Known / Previous IPs are disabled
- external IP Checks are disabled
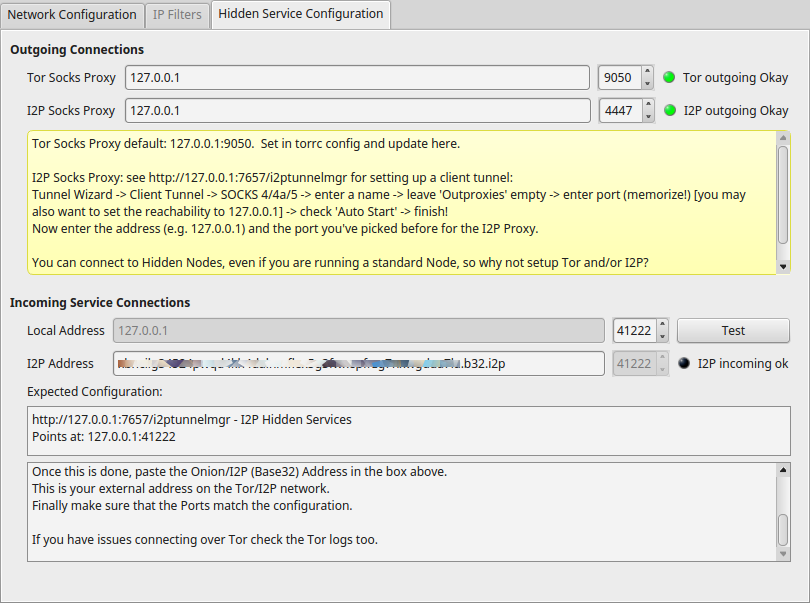
Hidden Service Configuration
Outgoing Connections
- Tor Socks Proxy
Tor also creates a SOCKS Proxy, which can be used to connect to Tor
Hidden RetroShare Nodes. - The Indicator shows if the proxy is working.
- I2P Socks Proxy
Your I2P Socks Proxy is normally available at localhost and port 4447. - The Indicator shows if the proxy is working.
Incoming Connections
- Local Address
This Address is locked to 127.0.0.1
- Local Port
The Port where RetroShare is listening
- Local Port
- I2P Base32 Address
Here you need to enter the Hostname which has been created by the I2P Server Tunnel.- I2P Port
I2P Base32 do not listen to a specific port.
- I2P Port
